adplus-dvertising
Connect with us

Tech

Sony allegedly 'struggling' to keep PlayStation 5 price down. What's it mean for Xbox Series X? – Windows Central

Published

 on


Bloomberg Technology claims Sony is running into some manufacturing issues with the forthcoming PlayStation 5. The reporting cites “scare components” as the issue, resulting in a significant push in costs for the next-gen gaming console.

The problem is a familiar one. Sony is supposedly having a tough time securing reasonable prices on a reliable supply of DRAM and NAND flash memory. It’s so bad that Sony also reportedly canceled some new features for a mirrorless camera due to the DRAM supply problem (just three companies manufacture 98 percent of the world’s supply).

The reason is simple: smartphones. Samsung’s latest Galaxy S20 lineup is massive, and its specs have only gone up in recent years, cutting into the same supply that game consoles use. Apple can’t be dismissed from this either, as that company is notorious for locking up supply components early and fast due to its size, influence, and position in the market.

300x250x1

Bloomberg Technology adds that some other costs for the PlayStation 5 that are already locked in, including a more expensive than usual cooling system.

With the PlayStation 5 reportedly costing $450 per unit, the reporting suggests a $470 price tag for the console to maintain a similar gross margin to PlayStation 4. That older unit supposedly costs just $381 to make and sells for $399, making Sony’s latest significantly more expensive. Kotaku sees that pricing as even more dire for the Australian market after shipping and distribution costs are factored in.

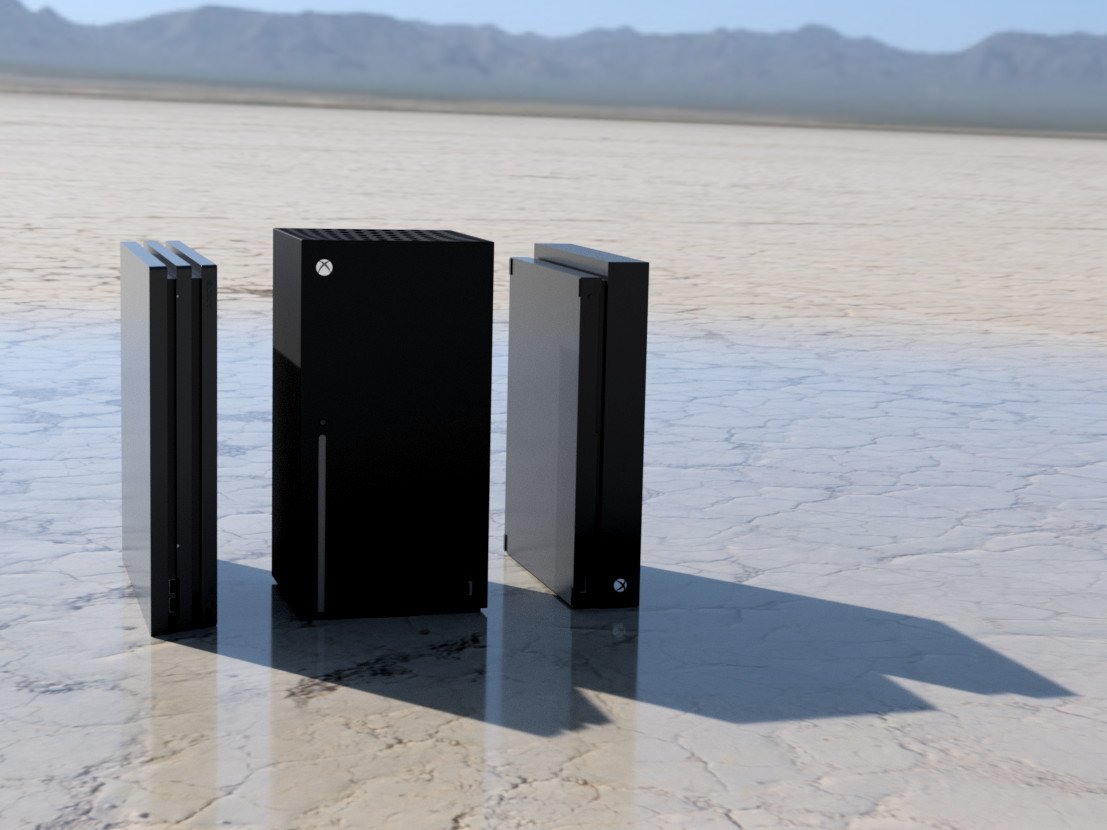
Surprisingly, there is no mention of Microsoft and its Xbox Series X console in this reporting. Microsoft’s console also uses many high-end components, and its price is not expected to be as low as the One X or One S, which remain as options for consumers. Indeed, one report says that Series X’s SSD may actually be DRAM-less – a first in this market – which could help Microsoft skirt this supply issue, at least partially. The solution for Microsoft, which is unconfirmed, is the reliance on Phison’s newer PS5019-E19T flash memory controller.

At XO19 last year, head of Xbox Phil Spencer remarked, “I would say a learning from the Xbox One generation is we will not be out of position on power or price,” suggesting the company has thought long and hard about this topic. Confirming this, recent reporting suggests Microsoft has added support for next-gen CFExpress SSD cards for easy, fast (and pricey) storage expansion.

Nonetheless, as electronics, smartphones, laptops, gaming consoles, and even smart cars begin to suck up more silicon, it’s not known what impact this will have on Series X pricing. Many tech companies – including Microsoft – also are factoring in the COVID-19 Coronavirus outbreak into quarterly guidance for investors (NVIDIA did the same on February 13).

How Sony copes with its supply problems could be a big deal, especially if the company must sell “at cost,” which undercuts revenue. Microsoft doesn’t seem to be concerned, though, as so far, we have not heard anything dire. How the pricing shakes out between the two gaming behemoths will be fascinating to watch.

Let’s block ads! (Why?)

728x90x4

Source link

Continue Reading

Tech

Save $700 Off This 4K Projector at Amazon While You Still Can – CNET

Published

 on


While it’s true that high-end TVs seem to be getting ever bigger, they still can’t compete with the best projectors when it comes to image size. If you choose a good 4K projector you’ll even get top-notch image quality as well. Right now you can pick one of those projectors up and save a whopping $700 to boot. That’s possible thanks to an Amazon deal that slashes the Xgimi Horizon Pro projector’s price to just $999, a return to its best price ever there. This deal doesn’t require you to enter any pesky codes or clip any coupons, but these kinds of limited-time deals also don’t have a published end date which means that this discount could end at any minute and without warning — be sure to keep that in mind.

The Xgimi Horizon Pro 4K has a ton of features that make it a great option for anyone looking to upgrade their old projector or make the jump from a big-screen TV. The 4K resolution and support for HDR ensure you’ll get a great picture, while the ultra-bright 1,500 ISO lumens mean you won’t find yourself squinting at a dark image. Other features of note include auto keystone correction and an autofocus capability. And we didn’t even get to the fact that this projector can generate a 200-inch image yet, either.

Looking to enjoy content without the hassle of wires? This projector has Android TV built in so you can enjoy any of the more than 5,000 Google Play apps while Chomecast support is built-in as well.

300x250x1

Alternatively, the Xgimi Halo Plus projector is our top pick for a portable 1080p projector, making it great for camping trips and more — and right now a 23% discount means you can get one for just $650. Finally, the Xgimi MoGo2 is another protector designed to help you want content on the go and now it’s available at almost its best price yet at just $250.

Not sure that a projector is for you but still want to enjoy a great picture? Our list of the best OLED TV deals is just the ticket.


728x90x4

Source link

Continue Reading

Tech

Nothing to integrate Chat-GPT into new earbuds and its phones – MobileSyrup

Published

 on


During its new earbuds announcement event, Nothing shared that it plans to add Chat-GPT support to its earbuds.

The feature will be tied to Nothing Phones, so users with iPhones or other Android handsets will be stuck using Siri or Google Assistant instead.

If you want to take advantage of Open AI’s assistant, you’ll need to wait. A Nothing spokesperson told The Verge that the feature will roll out slowly to the Nothing Phone (2) starting on April 18th, followed by the Phone (1) and Phone (2a) a few weeks later. The company’s blog post also states that this is “coming soon to our other audio products,” so it seems like Ear (1) and Ear (2) owners will get the feature as well.

300x250x1

It will be interesting to see if adding an AI chatbot to these earbud-based digital assistants will make people use them more. I typically use AirPods, and while I appreciate it when Siri reads my messages out loud, I never find myself triggering it through my earbuds to start timers or ask regular questions. That said, as new AI tools like the Humane Pin might fall flat, maybe something more subtle built into our existing tech will be more convenient for people.

Beyond how it works, integrating Chat-GPT is a smart move for Nothing. OpenAI has strong branding in AI, and using Chat-GPT instead of Google’s Gemini helps separate the Nothing phones from the Google Pixel lineup.

Nothing also plans to integrate Chat-GPT into Nothing OS 2.5.5. This includes a new Chat-GPT widget and options to analyze your screenshots and your clipboard with the AI assistant. Other improvements are coming in the update as well, including new Ringer controls and a RAM boost mode. You can see the full update list here.

Source: Nothing Via: The Verge

Adblock test (Why?)

728x90x4

Source link

Continue Reading

Tech

Protecting APIs in Financial Services with Zero Trust Overlay Mesh Networks – InfoQ.com

Published

 on


Transcript

Dovholuk: We’re going to talk about protecting financial services, but we’re going to use the zero-trust overlay to do that. Usually, when I talk to people, and I say we’re going to talk about zero trust, this is what happens. Everybody is like, “I have heard everything there is about zero trust. I’m tired of it.” It’s a terrible term. It’s been abused. It’s been reused. Really, when it comes to zero trust, I think of explicit trust. What we’re doing is we really want to know who it is, is connecting to our APIs, who it is, is connecting to our services. We need to know the exact identity. Zero trust, terrible term. Why is zero trust important? Anybody see this? This came out, and my marketing guy said, “Look at this, CISA has banned remote management of network devices, unless they’re only accessible from the internet if they implement a zero-trust architecture.”

This is a guy named Philip. Philip said to me something that I’ll never forget. He said, developers don’t care about security. Why is it developers don’t care about security? Philip is not alone. If you go to Google and type it in, you’re going to see, why don’t developers care about security? Why don’t they prioritize security? You find it all over the place. I think we all know, we all care about security. It’s just, we’re busy doing other things. We’re busy actually producing products, filling up features, and completing actual tasks marked in our Jira board. Joel Spolsky, founder of Stack Overflow has a fantastic quote, “Shipping is a feature, your product must have this feature.” Don’t spend time gold plating everything, you’ve got to ship. Security is the same way. Security is also a feature, you need to start thinking of security as a feature. If you’re a VP of engineering, if you’re a product manager, product owner, give time to security, let your developers create a better, more secure infrastructure. Obviously, in the FinTech world, even more important. I am a FinTech user, I want my applications secure.

Current Network Security Setup

This is an overview of current network security. You’re going to see the classic wall and moat. Once you get behind the wall, once you get over the moat, you’re safe and secure, you are trusted. Ten years ago, 15 years ago, we were doing this all without TLS. We said, that’s fine. HTTP, FTP, whatever, nobody is going to be on my internal network. It’s safe and secure. Today, TLS everywhere, let’s start SCP, let’s stop HTTPS. Then developers we’re, “It’s hard.” How can we cert? What are we going to cert from? It’s a pain in the butt.

300x250x1

HTTPS Everywhere was out there. For all my mothers out there, I use the my mother rule, “If my mother can do it, then a user can do it.” HTTPS Everywhere was really cool. It was a plugin you would install on your browser. It would automatically upgrade you from HTTP to HTTPS. Such a good idea. Every browser does this now, and the Electronic Frontier Foundation got rid of it. Let’s Encrypt, also really important. Let’s Encrypt made certificates easy to obtain for all of us, legitimate third party, verifiable CAs, shipped with your operating system. Now you can use those, thankfully, due to Let’s Encrypt. Two more projects doing some interesting things, which we’ll talk about: SPIFFE/SPIRE and OpenZiti. I work for OpenZiti, but it’s an open source project, totally open source, totally free. SPIRE is interesting, because it’s a Cloud Native Computing Foundation project, and it’s graduated. Not too many of those. Guarantee you’ve heard of all of them. Kubernetes, Prometheus, you name it, there’s a bunch of them.

Overview of Zero Trust

This is what we’re going to talk about. Overview of zero trust, again. Here are some of the really important pillars of zero trust I find most relevant to this talk. The most important one is device identity. Device identity is really nice. It’s about having a strong identity deployed on every single device in your network. Then your network can make decisions based on that strong identity. Let’s take that one step further and go to workload identity. Workload fancy term for just some program running somewhere. Generally, you think of workloads running in Kubernetes, or something like lambda, some serverless type of thing. It’s just some idea of some process running somewhere. What’s really nice is now you can have many of these identities all on one machine, all local. You don’t have to have a single device identity. You can have multiple identities. Least-privilege, very important pillar of zero trust, since this says, the network knows that strong identity will not permit a nefarious attacker who gets compromised. We were talking about USBs before, don’t plug somebody’s USB into your laptop, you never know, or even cables now. If they’re not able to communicate to the target of opportunity, they can’t communicate to that target of opportunity. Continuous authorization or posture checking, here you want to make sure, “We checked it once, but did it change?” You want to know, are you on the latest patch? You want to know, do you have a certain process, usually a virus scanner running, that sort of thing. Or you want to have short-lived certificates. This is the longest path that a human can walk across the earth. This is your journey to application embedded zero trust. You’re not going to start from point A to point B, you’re going to get there after a long time. Don’t be afraid if you stop in Egypt somewhere, or you go all the way off to the Pacific Ocean. It’s a journey. It’ll take a while. Application embedded zero trust, we’ll see that in action. Hopefully, I’ll convince you that this is not just some myth and you could do it too.

Introducing SPIRE: The SPIFFE Runtime Environment

First, we’re going to look at SPIRE or SPIFFE/SPIRE. You’ll see these two words used a lot. They’re open source projects. You can go out there, get all this stuff for free. It’s a universal identity control plane for distributed systems. Radia was talking about identity. SPIFFE/SPIRE is a runtime implementation of SPIFFE looking to solve the hard process of delivering identity to workloads, to users. If you go out and look at their website, they’ll say one thing, securing microservices. Authenticating to common databases. These are all the common use cases you’re going to want: mutual TLS, strong identity for securing your APIs. SPIFFE is a set of specifications only. Here are the specifications. You can go out to that big long URL and find them or you can just go out and type SPIFFE. A few of them are important to us: the SPIFFE ID, the SVIDs, the Workload Endpoint. Those are specifications, they’re very attainable. Usually you go out, you read an RFC, and your eyes roll back in your head and you’re like, I got to click 85 other links to go through all these things. Very easy to read these specifications. I even did it. SPIFFE ID is interesting, SVIDs, we’ll see. SPIFFE ID is just a unique string. It’s the way that you identify an identity. It’ll start with SPIFFE:// and then have a trust domain associated to it. Then whatever you want after that. SVIDs, Secure Verifiable Identity Documents, basically cryptographically verifiable identities. Usually comes in the form nowadays of X.509, which is a certificate, PKI we’ve probably all heard about, and JWTs. JWT is signed document, comes in three parts.

Here’s an overview what SPIRE looks like. You’re going to have a SPIRE server, SPIRE agent and workloads. That SPIRE server is going to do one thing, it’s going to talk to the SPIRE agent, while the agent is going to talk to the SPIRE server. It does that for this one thing called node attestation. Very important. I actually heard a lady from Google talking about attestations of software during the build process, same idea. This is node attestation. It’s basically saying, is this node who I think it is? It’s all back to bootstrapping trust. The SPIRE agent needs to present something to the SPIRE server, that SPIRE server can say, yes, I verify that. SPIRE agents and workloads also do workload attestation, same thing but slightly different. In the example I’m going to show you, the workload attestation is performed by the agent itself. The workload will come online, talk to the agent, and the agent will introspect something into that workload that just came online and make a decision about the workload’s attestation and what it is able to present itself as, what its identity is. SPIRE server, few little tidbits that are relevant: the address port, the trust domain. Address and port on the underlay. Underlay an important term to remember. I’ll use the word underlay and overlay throughout. Underlay means IP address, usually. TTL is time to live. It’s how long you let something live for. Plugins, there are some plugins that you configure the SPIRE server with. Datastore. KeyManager, we’re not going to care about. The NodeAttestor we’ll take a look at. SPIRE agent has similar things, has a trust domain, has an address and port it will contact the SPIRE server on. It has this insecure bootstrap that I’m using. Anybody who’s used SPIRE is going to go, “No, he’s used insecure bootstrap.” It’s for demo and there are better ways to do it than use insecure bootstrap. You should try it out because all the code you’re going to see you’re going to be able to get from my GitHub. KeyManager, NodeAttestor, WorkloadAttestor. NodeAttestor, WorkloadAttestor are important for agents, and we’ll see those here too.

Introducing OpenZiti: Full Zero Trust Overlay Network+

We’re going to flip modes and we’re going to talk about OpenZiti. SPIRE is about delivering identities. OpenZiti is the zero-trust overlay mesh network that I work on. I’m actually a committer on the project, I’m not just a figurehead. What is an overlay network? Usually, you think of an overlay network as, you need some network so it’s most advantageous to deploy your overlay right on the open internet. You don’t have to. If you have a private network, you can use a private network too. OpenZiti will actually also install into an air-gapped environment. You can bring it someplace entirely secure. We’ll just call that our Ziti Overlay Network. We’ll put a controller on that, the controller’s job is to do authentication, authorization. When something connects to the controller, it will determine its authenticity, similar that the SPIRE server does. We’ll have some edge routers, or routers in general. These form your mesh overlay network. They talk to one another, and they talk to the ones that they’re informed to talk to. Then they’ll also talk to the controller. They’ll do that all through mutual TLS, and OpenZiti will bootstrap all of this on your behalf. That’s all done for the explicit purpose of having an edge on the left-hand side, an edge client talking to an API so that we can send data. My favorite feature of OpenZiti and the zero-trust overlay, is your server, if it has OpenZiti installed in it, has no listening ports. How is that? It’s crazy. We’ll see how that works.

Zero trust network access, this is what most people think of when they think about zero trust. I trust my private network, it’s fine. Never going to get compromised, no problems, HTTP. Obviously, it’s not great, because we have some trusted network on the left, we have some trusted network on the right, we have some targets of opportunity if we’re able to land and expand. Next level, scaling up zero trust host access. Here, you take an agent, and you install it on that local machine, and that local agent is able to intercept traffic locally, keeping it only on your host operating system, or Kubernetes, or whatever. Then teleporting it wherever you want it to go to, to the other side, and the other side could be configured to offload to localhost or a 127, something non-routable. Then you know for sure that your traffic will not be traversing a network. Application access, here’s where you take an SDK and you actually stuff it into your application, you compile it in, or there are ways to post to do it. LD_PRELOAD trick from Linux lets you basically bootstrap some libraries ahead of time. That’s probably considered application embedded too, because it’s entirely in your runtime, in your environment, in your application. All the way to the server where the server has no listening ports, and so that’s called application access. I call it zero trust application access. Then if you have a hardware root trust, you can take that one step further, get a YubiKey or something along those lines, maybe a TPM, and do your cryptography outside of the operating system itself, so like a YubiKey, for example. Now you still have a little bit of trust, because you trust some parts of the operating system.

Example Code

Let’s look at the nerd stuff now, let’s look at code. Here is where you can get the source, https://github.com/dovholuknf/qcon2023. That’s where all the source code will live. It works on Linux. SPIRE doesn’t have a Mac client, so I couldn’t do it in Mac. If you run a virtual machine, or if you’re on Windows, use WSL, and that’s where I’ll be doing. I’m going to blast through the nosecurity example. This is just a baseline, what we’re going to do. We’re going to have a nosecurity server, and we’re going to have a nosecurity client. We’re going to turn it on, and then we’re going to talk to each other. I’m going to use Go, so you’ll see Go used here. What you can see is like on line five there, we’re serving no TLS. In Go, you can serve or you can serve TLS, either way, and so we’re going to do no TLS because this has no security. We’re going to create a server on top. We’re going to create an underlay listener on some port and that’s going to be our whole first demo. That’s what we’re going to do. Go has a bunch of imports, has a bunch of constants, you can check these out. Important one here is maybe the SocketPath, you can see that’s where the domain socket that your code will actually contact the agent on. A couple of SPIFFE IDs, we’re going to make a JWT client, a JWT server. JWT will come in later on, and a few ports that we’ll just open up. Make a server, handle the server, basic Go code. Again, very approachable, simple code, you can take this and try it at home. Creating an underlay listener, all this is standard library stuff, piece of cake. Then more standard library stuff. I wrote a simple math API. Our API we’re going to be securing, is just going to operate on two inputs, input1, input2, and then take some operator and work on it. Here is what our insecure client looks like. It’s going to create a mathUrl, add the math parameters, they’re going to be query parameters. You can just use your browser if you wanted to. We’re actually going to use curl, because if you parse the fourth argument, you will see the equivalent curl statement. That’ll come up later, because I want to prove there’s no smoking mirrors, so we’re going to use a third-party app in order to use that curl. Create the mathUrl, add the math parameters. I’m just going to blow through all this, call the API. Important part about calling the API, we’re using the default HTTP client from Go, which is nice, because once you secure the default HTTP client, every request through the Go runtime will have the security applied to it.

If you look right here, I’ve already run all this stuff. It’ll start up Docker. It’ll start up a zero-trust overlay network for you, OpenZiti network for you. It’ll download bootstrap and install SPIRE, the SPIRE agent, the SPIRE server. It’ll do all that stuff for you. It’ll configure your zero-trust overlay network. If you want to inspect all this stuff, you can go ahead and inspect all of that stuff. Run the server. You see, I’m just going to multiply 10 times 2. If you’re running on Linux, make sure you quote that, otherwise you’ll glob and have a bad time. You’ll get a result of 20. That’s what we would expect to see from our math service. If curl will help me out, I can run curl2, runs in the subshell because the API doesn’t have a new line at the end, so I got to echo it till I get a new line. That’s why it’s wrapped in a subshell. We haven’t done a darn thing to make this thing secure yet, so let’s do that. Secured by SPIRE. We’ll start with SPIRE. We’re going to take that 18080 port, no TLS, and we’re going to turn it into a mutually secured TLS endpoint, all in an hour. We already have our SPIRE server running. We already have our SPIRE agent running. That SPIRE agent needed to be configured, and the server needs to be configured too. When you look at that big, long script of bash that runs, you’ll see the important parts here are the bind address that binds on all interfaces, because I don’t know what your IP is. Then whatever your bind port is, this case, 8600, that’s where SPIRE server will be contacted on. We’re going to create a trust domain. We’re going to configure SPIRE with a JWT issuer, so that the OpenZiti runtime when we get there will know who issued the identity.

Important part of the server configuration, that NodeAttestor, we’re going to use the join_token plugin. If you look at the plugins that SPIRE supports, there’s a bunch of them. There’s AWS, GCP, Kubernetes is a big one. You’ll find SPIRE in Kubernetes a lot. Pay attention when you go to the doc, there’s the doc page, because there are server NodeAttestors, and there are agent NodeAttestors, and if you confuse the two, you will be quite confused as to why your configuration is not working and why SPIRE is crashing on you. We’re going to use the join_token. It’s the simplest example, but there are many examples that you can pull from. The agent is going to be configured similarly. We’ll tell it what its trust domain is, where to contact the SPIRE server, what port, and then that insecure bootstrap I mentioned before. Then, also, to configure the join_token in the SPIRE agent, so that when the SPIRE agent comes online, it can present that token back. Then we’re going to use the WorkloadAttestor of Unix. This is really cool. Also, discover workload path equals true. What that will do is it will actually inspect the path of the runtime that’s running, and based on where the path is, it will give you a certain kind of identity. When you try to debug this, if you try to run the server and the client as you, you’ll get the same identity. That’s not what you want. You want two different identities. Again, we’re going to use the join_token NodeAttestor. You can read all about these things, a bunch of agent NodeAttestors to pull from too.

We configured a SPIRE server by generating a token, we gave it the SPIFFE ID that we want it to be known by. That says, ok, this is the token to use, present this token back to me. Then when we run the SPIRE agent, we’ll use that particular token, and that’s how trust is bootstrapped. There are better mechanisms, again, only an hour. Now we’ve got a SPIFFE ID on our agent, we’ve got a listening 8600, and we’ve got a SPIRE server working. Now we’re going to go through the code to authorize those workloads. Again, that’s our goal, so that we can have a client SVID, a SPIFFE Verifiable Identity Document presented from the client to the server, and the server back again, all for the purpose of mutual TLS. Because if either of them don’t match up, you’re having no access, very important. We go through SPIRE server. We create an entry, we’re going to give it a JWT server as the SPIFFE ID, tell it where the parent is. Basically, this homes the identity to that particular agent. You can add DNS options as well to it, which is neat. If you want that server to be known by a certain DNS name, or name server entry, you can do it that way. Also, you can use top-level domains that don’t exist like .ziti. Then we’re going to use that cool Unix path selector to actually select the SPIRE server based on its path. When you run compile and run, it will come down and it will put that file in that exact location in your /temp folder. We’re then going to use the Unix WorkloadAttestor. It’s an eye chart, there we go. In the Unix path, you can choose what the Unix path is. There are lots of selectors that you can give SPIRE this information to, one of which, for example, is the SHA-256. If you know the exact path and you know the exact SHA, you can give those two selectors to SPIRE, and SPIRE can make a better decision about whether or not that identity is the one it’s supposed to be.

Now we have the server side working, now we’re going to look at some client-side code. Here’s what the code used to look like. There’s what the code looks like now. We haven’t added a bunch of lines of code. I’m going to hand wave a little bit, because there’s a couple of functions in here that I made, but we’ll see those. We create that server, again. We set up some options, which only go through to tell your runtime where to find the SPIRE agent. Then we configure that runtime for mutual TLS. We pass the HTTP server to a function I wrote called configure for mutual TLS. That’s all for the explicit purpose of serving TLS. Now we have TLS delivered, which is nice. As a developer, what have I done? I’ve added 50 lines of code maybe. Here’s what configure for mutual TLS looks like. It just calls workloadapi, which is a Go SPIFFE library. I don’t know if they have Python and all kinds of other libraries, I just use Go. Then it will call client RequireFromString, so you give it a SPIFFE string, a SPIFFE ID string. It says, now this is a SPIFFE ID. Then important down there, configure mutual TLS server config, TLS authorize ID of client ID. Only SPIFFE IDs that show up with that SPIFFE ID, only clients that show up with a certificate that is of that SPIFFE ID can actually contact and communicate to your service. Then you configure the server and you’re done, and now we’re serving TLS. Client looks almost the same. We’re going to make the mathUrl, but this time we’re going to use a secure port, so that way we don’t have port conflicts. We’re going to use HTTPS instead of HTTP, still listening on localhost, localhost. Set up at options. Then we’ll make this big long function. Go usually likes short functions, but I want one that actually makes sense, so SecureDefaultHttpClientWithSpireMTLS. That’s what that looks like. Also, 15 lines of real code here. Anybody who’s looked at Go knows the if error pattern. This creates a mutual TLS transport, and then a X.509 source is added to that transport in order to configure the whole thing for TLS. We’re going to look at that code later if we want.

In order to have SPIFFE servers, SPIFFE client, all be mutual TLS, so now we should be able to see this happen. Run the server. We obviously should get the same results, so it shouldn’t be all that spectacular. One of the things that is neat is if you look at the curl down here, notice I had to add a cert and a key to my curl. Let me run that curl statement, and we’ll see what happens if I run it. It should succeed. It does succeed, great. If we come up, and we delete off the cert, and make sure we’re not playing any games here, delete. We get no result. Also, notice that the server tells you, “That client did not provide a certificate.” Pretty cool, server has already authenticated your client, 50 lines of legitimate code. You would have to write that code in order to secure your services with mutual TLS with SPIRE.

What do we do? We deployed a SPIRE server, we deployed a SPIRE agent, modified three lines of the server code, five lines of the client-side code, and we added mutual TLS to our solution. We have end-to-end encryption. Because it’s mutual TLS, you know that the server is actually the one that is presenting that SPIFFE ID. HTTP got to be a little careful, because there are some tricks that you could play in there, and somebody else could obtain your certificate if they had a valid SPIFFE ID, but let’s assume that they don’t. You got end-to-end encryption. You have implicit attestation by having the SPIRE agent deliver that certificate to the client and to the server, which for me as a developer was the best part, or mutual TLS was maybe the best part. I got that basically for free. I have short-lived automatic cert rotation, all by just doing that. That’s pretty cool stuff.

Server Secured by OpenZiti

We’re going to look at the same sort of thing but with OpenZiti. OpenZiti, same sort of setup. What we’ll have is we’ll have a router in play, that middle thing, and we’ll have a controller in play. That’ll be useful because the router is what’s going to have a listening port, the server application will not have a listening port. If you put that router somewhere in the cloud, nobody would ever know that you were talking locally to a service that was running here talking to here, because it goes up and through that router in the sky, or a local or whatever. Controller is also available for authorization and authentication.

OpenZiti has a bootstrapping trust process, it looks like this. Now we’re going to actually configure the OpenZiti overlay. To do that, we’re going to use a JWT. Here in Ziti land, we’re going to create an external JWT signer. That external JWT signer will have a JWKS endpoint, that’s how Ziti is going to be able to validate the JWT that is provided back to OpenZiti in order to prove that connection’s identity. It’s going to also require an audience. The JWT spec says, if you’re sending this to somebody else for verification, the audience should be filled in. If you don’t fill in the audience, then you must reject the JWT. You need to fill out that audience, and that’s where the audience comes from. Once we have an external JWT signer created, we’re then going to associate that signer to an authentication policy. Very flexible. OpenZiti is structured so you can have multiple authentication policies. In this case, we’re going to say the primary authentication that is allowed is a JWT, so when the JWT shows up, what’s the signer that’s going to be used by? Use that signer, use that JWKS endpoint, verify that JWT. We’re then going to make more identities. These are OpenZiti identities, and so those identities are part of the overlay network itself. We’re going to associate the external ID, that SPIFFE ID to each identity, and we’re going to make an authentication policy, it’s associated to the identity as well. Again, very flexible. Now those identities can be verified by JWTs, specified and provided by SPIRE. That’s what we’ll see.

We’ll set up some configuration stuff, this is OpenZiti-ism, it’s got an intercept involved. Also notice, cool part of OpenZiti, totally fabricated DNS names. You can have totally private DNS. Openziti.ziti is what I’m going to use. Then we’re going to make one for SPIRE and OpenZiti. Then we’ll see OpenZiti and SPIRE together, also totally fabricated DNS. Then, OpenZiti, one more layer of security, you have to authorize these identities for which services they’re able to talk to. The demo services are going to be able to be bound or served by demo servers. The clients will be bound or served by demo clients. Client code, this is what it used to look like, here’s what it looks like now. Not a whole lot more code, same sort of thing. This time, what’s different is we’re going to fetch a JWT from SPIRE. Now SPIRE is providing the JWT for OpenZiti. OpenZiti will then create an overlay listener or an OpenZiti listener. That’s nice because we’ll have no port, but we’re going to serve. Where’s our TLS? That’s cool. Don’t worry about it. OpenZiti provides end-to-end encryption, so you don’t need to serve TLS. You can if you want to, but you don’t have to. You still have end-to-end encryption, it’s not mutual TLS: kind of the same, kind of different. The client looks very similar. We have the workloadapi, WithClientOptions. We have the CreateMathUrl. The client also fetches a JWT and uses that JWT to secure itself. Still listening on HTTP, but it’s cool because we have end-to-end encryption. Then also notice, totally fabricated URL, I made up openziti.ziti.

If we go in here, and we look at the JWT, where it’s used, you’ll see that it’s used in here, when we create a ZitifiedTransport, which is all an SDK option that you would get from OpenZiti. Here, we’re making our new credentials, we’re pulling down our CA pool, or you can provide your own CA pool if that’s what you prefer. Then we’ll use all those things in order to authenticate. We’ll do a context authenticate. Then the ziti.DefaultClientCollection.Add, that’s the magic that lets the default HTTP client find openziti.ziti, and pass that traffic properly. Then we’ll make a ZitifiedTransport, and associate that transport to the HTTP server. That’s what we’ll end up doing. We’ll see that in action, too. There’s an important point in here, and we’ll see this happen. Of course, you notice it’ll actually work without OpenZiti. If you want it to work, you need to provision that identity. We have that server running. If I do an ss -lntp, and pipe that to grep for 18000 and something. I’m going to do a sudo on this too. It’s not 18082, which is what the port’s supposed to be. That’s a whole different server that’s running. It’s not running on 18082. There’s actually no server running. Down here, if I try to do this curl, which it says, of course you know this will not work. This actually will not work, there is nothing to respond to. What I can do instead is I can go back over to my OpenZiti tunneler, which is a client that is used to get yourself onto the OpenZiti overlay if you are not application embedded, then I can add an identity. Hopefully, it hasn’t timed out. That’s over here. You’re calling temp local Docker user. When that’s done, I should see a local Docker user, and it’s got two services. Now my curl statement, it works. Now I’m demonstrating that zero trust host access. On the host side, my client side, I have a tunneler that is allowing me to tunnel across, in this case, locally, to my server, which has no listening ports. No listening ports, that’s amazing. There’s our demo. Now we have no listening ports.

Questions and Answers

Participant: Really big messages, big work, so everything has to go through the tunnel?

Dovholuk: Everything has to go through the tunnel in this zero-trust overlay network.

Participant: That would mean more [inaudible 00:33:50], latency.

Dovholuk: It definitely is going to impact your latency. On top of that, end-to-end encryption is going to add yet more latency. Sometimes I know, some FinTech stuff doesn’t even use TLS anymore. It’s just a trusted network, and that’s how it’s going to be. That’s not the place to port OpenZiti in. OpenZiti is where you can’t allow for a device or a service to become compromised through side channel attacks, Log4Shell type stuff. That’s where OpenZiti is much more important. Your phone app that goes from your phone to wherever the server is, it takes your application entirely offline, can’t be DoSed, that sort of stuff.

No listening ports is my favorite piece of OpenZiti. Ubiquitous connectivity is another amazing feature of this. You have basically an invisible tunnel that goes from wherever to wherever. I’ve run Kubernetes minikube on my local computer, and given somebody an identity and had them connect to my minikube from their house, all without exposing any ports through my own firewall. That stuff is crazy. The key here is we’re also authorizing before connecting. Before, every time I did a mutual TLS connection, the server noticed and responded and said, no, it didn’t work. If there happens to be a zero day or something goes wrong with that, you could have potential problems there. Log4Shell was one of the ones that was relatively impacted by that sort of zero day. Now you’re authorizing before connect. You can’t even send packets to the destination server without showing up onto the OpenZiti overlay network, without being authorized, without being authenticated as well. Authentication is not sufficient, you must also be authorized. That’s the OpenZiti demo I can give.

The cool thing about the demo is obviously with mutual TLS, you can add mutual TLS to your particular solution, as well as OpenZiti, so you can have mutual TLS provide its identity from SPIRE, as well as OpenZiti overlay network providing your authorize before connect, and giving the best of both worlds, if that’s the sort of thing that you’re into.

You can go out and learn about SPIRE and SPIFFE at spiffe.io. It’s also on GitHub. Openziti.io also brings you there, github.com/openziti/ziti.

There’s some cool other tech that OpenZiti produces called BrowZer. It’s like dripping wet type stuff. If you were to go to this URL and plop in your email address, what will happen is I’ll provision an OpenZiti identity using an ngrok. zrok is an ngrok-esque competitor. zrok is very similar to ngrok, it provides very easy access publicly to something that is shared privately. Here, running on my local laptop, that process I had mentioned up at the top right there, is actually the server that will be listening. What will happen is it’ll provision an identity on my OpenZiti overlay, but then uses some new tech called BrowZer. BrowZer is really neat because BrowZer bootstraps zero trust in your actual browser without installing a client, which seems like magic and works like magic. Then, if you do that whole thing, you’ll get the Docker Whale down there, which is running somewhere up in VPC land in Amazon.

See more presentations with transcripts

Adblock test (Why?)

728x90x4

Source link

Continue Reading

Trending