


In most of Canada, dahlia tubers will not survive winter in the ground, so the job is to dig them up shortly after the first hard frost blackens the foliage, cure them for a day or two, and pack them somewhere dark that stays between 4 C and 10 C. Get the temperature, the humidity and the labelling right, and the same clump that bloomed all August will bloom again next summer.
The timing question is the one that trips up most gardeners, because “after the first frost” means very different calendar dates depending on where you live. Using Environment and Climate Change Canada climate normals for the 1991 to 2020 reference period, average first fall frost lands around Sept. 12 in Saskatoon, Sept. 17 in Regina, Sept. 20 in Winnipeg, Sept. 21 in Calgary, Sept. 23 in Edmonton, Sept. 28 in Quebec City, Oct. 7 in Montreal, Oct. 12 in Ottawa, Oct. 18 in Halifax, and as late as Nov. 1 in Toronto and Nov. 30 in Vancouver. Those are 50th-percentile averages, which means half of years frost earlier and half later, and in any given year the real date can land two or three weeks off in either direction. Prairie gardeners should be watching the forecast now. Gardeners in coastal zone 8 areas such as Vancouver and Victoria can often skip the dig entirely and leave tubers in the ground under a thick mulch layer, and some zone 7 gardeners in the Niagara region and the B.C. interior valleys manage the same with 15 to 30 centimetres of insulating mulch. Everywhere else in the country, a hard freeze will turn tubers to mush, so lifting them is the only reliable option.
None of this work involves electrical, gas, structural or roof access, and all of it happens at ground level with hand tools. The steps below are drawn from Oregon State University Extension guidance relayed through horticultural sources, University of New Hampshire Extension, the American Dahlia Society and Canadian growers.
Step 1: Watch the forecast and wait for the first hard frost
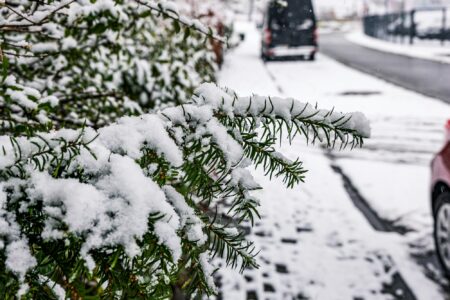
Do not dig early. The frost that blackens dahlia foliage also signals the tubers to firm up and finish maturing, which is what makes them keep. Once the tops have gone black and mushy, you have a window of several days to a couple of weeks to lift them, as long as the ground itself has not frozen solid.
Step 2: Cut the stems back
Using clean secateurs or loppers, cut the blackened stems back to roughly 15 centimetres above the soil. Leaving a short stub gives you a handle for lifting and a place to attach a label. Some growers wait one to two weeks after cutting back before digging, which helps the eyes on the crown become more visible.
Step 3: Loosen the soil and lift the clump
Start about 30 centimetres out from the stem and work a garden fork or spade around the entire clump, prying gently to break the soil’s grip. Dahlia tubers snap easily at the neck, and a broken neck means a tuber that will not sprout, so lever the clump up from underneath rather than pulling on the stem.
Step 4: Clean the tubers
If you garden in light sandy soil, brushing the excess dirt off with a stiff paintbrush is enough. In heavy clay, you will need to rinse the clumps with a hose or in a bucket of water to see what you are working with. Wash thoroughly if you wash at all, since half-cleaned tubers trap moisture and rot.
Step 5: Cure them for one to two days
Stand the clumps upside down so water drains out of the hollow stems, and leave them somewhere frost-free and sheltered, such as a garage or covered porch, for one to two days. The goal is a dry skin, not a shrivelled tuber, so do not leave them curing for a week in a warm room.
Step 6: Decide whether to divide now or in spring
Both work. Dividing in fall lets the cut wounds heal during storage and saves space, but the eyes are harder to see. Dividing in spring is easier because the eyes have begun to swell and are obvious. Whichever you choose, every viable division needs an intact neck, a piece of the crown and at least one eye, because tubers without an eye will never sprout.
Step 7: Label everything
Write the variety name directly on the tuber with a permanent marker or attach a tag to the stem stub. Clumps look identical by February, and unlabelled tubers are the most common reason gardeners end up with a bed of mystery dahlias.
Step 8: Pack them in a storage medium
Coarse vermiculite, wood shavings, slightly damp peat moss or dry newspaper wrapping all work. The medium’s job is to buffer humidity so the tubers neither dry out nor sit wet. Growers commonly pack tubers in coarse vermiculite in plastic bags, and coarse grades perform better than fine horticultural vermiculite. Do not seal bags airtight; leave them open or perforated so moisture can exchange.
Step 9: Store them cool, dark and humid
Aim for 4 C to 10 C (40 F to 50 F) with roughly 75 to 85 per cent humidity, in the dark. An unheated basement, a frost-free garage, a cold room or a root cellar all qualify. Below freezing, the tubers are destroyed. Much above 10 C, they wake up early and sprout in the bag. Too dry, and they dehydrate, which is one of the most common storage failures.
Step 10: Check them every three to four weeks
Open the bags or bins on a schedule through the winter. Discard anything soft or mouldy before it spreads, mist the medium lightly if tubers are visibly shrivelling, and open the packaging for a while if you see condensation. Problems caught in November are almost always fixable. Problems found in April usually are not.
Come spring, bring the tubers out about two to four weeks before your last frost date, divide any clumps you left whole, and pot them up or plant them out once the soil has warmed. Gardeners who are unsure whether their local climate allows in-ground overwintering should check their plant hardiness zone before skipping the dig, and anyone storing a large or valuable collection may want to invest in a cheap digital thermometer and hygrometer for the storage space.
Sources: University of New Hampshire Extension; American Dahlia Society; Oregon State University Extension storage guidance; ClimateData.ca and Environment and Climate Change Canada 1991 to 2020 climate normals; GrowersGuide.ca; Wallish Greenhouses.
Follow Canada News Media
Get the day's top Canadian stories and our two daily 60-second news videos wherever you scroll.
X Threads Facebook Instagram LinkedIn TikTok YouTube Pinterest Reddit Substack Flipboard Newsletter RSS