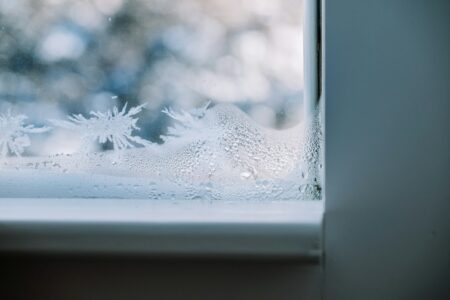




Sealing the gaps around windows, doors and electrical outlets is one of the cheapest and fastest ways to cut a home’s heating bill before winter sets in, and most of the work can be done in an afternoon with a caulking gun, some weatherstripping and a roll of foam tape. As temperatures across Canada drop through October and November, uninsulated gaps let warm air escape and cold air in, forcing furnaces to run longer and utility bills to climb. BC Hydro and Ontario’s Save on Energy program, the province’s energy conservation agency, both list draft-proofing among the highest-return home improvements available heading into the heating season, well ahead of costlier fixes like new windows or added insulation. The work does not call for special tools or a contractor. It comes down to finding where the air is escaping, then sealing each spot with the right material. Here is a step-by-step guide to identifying and closing off the most common sources of drafts before the cold arrives.
- Find the drafts first. Before buying any materials, locate where the air is actually getting in. BC Hydro recommends four checks: run a hand or a thermal detector along window and door frames and note any spot where the temperature drops by 5 degrees Celsius or more, light a stick of incense near a frame on a windy day and watch for smoke that moves sideways instead of rising straight up, close the window or door and listen for whether outside noise is still clearly audible, and, for a more precise read, hire a professional energy auditor to run a blower door test. Mark every gap you find with a piece of tape so you don’t have to search twice.
- Gather the right materials for each spot. Weatherstripping is not one product. Save on Energy lists five common types: adhesive-backed foam or rubber tape, which is the cheapest and easiest to install but wears out fastest; felt, which is stapled on and typically lasts one to two years; V-strips, a durable metal or vinyl option often used on high-traffic doors; tubular rubber or vinyl, which is more work to install but can last around five years and forms a tighter seal; and door sweeps, sold in plastic, vinyl or felt-brush versions for the bottom of exterior doors. Add caulk or spray foam for gaps in frames, and foam gasket pads, which run about a dollar each, for electrical outlets and switches on exterior walls.
- Measure before you buy. Measure the full perimeter of every window and door you plan to seal, then add 5 to 10 per cent to that total to allow for cutting waste and mistakes, as Save on Energy advises. A door sweep starts at roughly $9, so a full afternoon of materials for an average home is a modest cost compared with a winter of heat loss.
- Weatherstrip window and door frames. Clean and dry the surface first; weatherstripping will not adhere properly to a dusty or damp frame. For foam tape, measure the length needed, cut it to size, peel the adhesive backing, and press it firmly along the frame so it makes full contact. For V-seal strips, measure the same way, fold the strip down the middle so the adhesive faces out, peel the backing as you go, and press it into place, then open and close the window or door a few times to check that it seals without binding.
- Install a door sweep on exterior doors. Screw or stick the sweep to the bottom of the door so its edge brushes the threshold when the door is closed, without dragging so hard that the door becomes difficult to open. This is one of the largest single gaps in most homes and one of the fastest fixes.
- Caulk gaps and cracks around frames. Where the window or door frame meets the wall, run a bead of caulk or spray foam into any visible crack. This seals the structural gap that weatherstripping, which only covers the moving parts of a window or door, cannot reach.
- Cover single-pane or older windows with insulating film. If a window is single-pane or noticeably draftier than the rest of the house, a plastic window insulating film, taped around the frame and shrunk tight with a hair dryer, adds a temporary extra layer that cuts heat loss through the glass itself.
- Insulate outlets and switches on exterior walls. Exterior walls lose a surprising amount of heat through electrical boxes. Turn off the breaker for the circuit as a precaution, remove the outlet or switch cover plate with a screwdriver, place a pre-cut foam gasket pad over the outlet or switch, and reattach the cover plate. This step involves no wiring, only the cover plate and a foam pad, but always shut off power at the breaker before removing any cover.
- Check vents, pipes and cables where they pass through walls. Small gaps around dryer vents, pipes and cable lines are another common leak point. Seal the gap where the fitting meets the wall with caulk on the interior side.
- Recheck your work. Once everything is sealed, repeat the hand, incense or noise test from step one at each spot you treated to confirm the draft is gone.
For anything beyond these sealing jobs, such as replacing an entire window, adding attic or wall insulation, or any work that involves a home’s electrical panel or wiring, hire a licensed contractor or electrician rather than tackling it yourself.
Draft-proofing is one of the few winter-prep jobs that pays for itself almost immediately, and doing it now, before the first hard frost, means a warmer home and a smaller heating bill for the whole season ahead.
Sources: BC Hydro’s draftproofing guide (bchydro.com) and Save on Energy’s weatherstripping guide (saveonenergy.ca), both consulted September 2026.
Follow Canada News Media
Get the day's top Canadian stories and our two daily 60-second news videos wherever you scroll.
X Threads Facebook Instagram LinkedIn TikTok YouTube Pinterest Reddit Substack Flipboard Newsletter RSS